Feeling bored? Or creative? Feeling like your doll needs a new look? Or just want to play "fashion designer" for the day? Grab some supplies and join me for a kimono sewing bee! (Mine was made on a rainy afternoon in Maine, while on vacation with my husband's family!

You will need:
- measuring tape
- pencil
- ruler
- fabric
- thread
- pins
- scissors
- needle
- wide hem facing/bias tape
- snap (optional).
2. Measure and record body height (top of your doll’s shoulder to the floor).

4. Measure and record armhole height (from top of doll’s shoulder to waistline).
5. Measure and cut 3 rectangles of fabric, one for the body and 2 for the sleeves, following the dimensions:
- Body Width: half of body width measurement plus ¼” seam allowance on each side.
- Body Length: multiply the body height measurement by 2 plus ½” hem on each end.
- Sleeve Width: one quarter of body width measurement plus ¼” seam allowance on each side.
- Sleeve Length: multiply the body height measurement by 2 plus ½” hem on each end.
6. Mark center front cut line down exact center of body piece, up to halfway point (now center of neck hole).
7. Mark circle centered over neck hold point, same diameter as neck diameter measurement.
8. Blend line from wide point of neck hole to center front cut line.
9. Along length of each rectangle, mark halfway point (this is the top of the shoulder).
10. Then, mark points of either side that are the same length as the armhole height measurement.
11. Pin and stitch sleeves to body between 2 armhole markings.
12. Pin and stitch side seams and around sleeves and body, as shown.
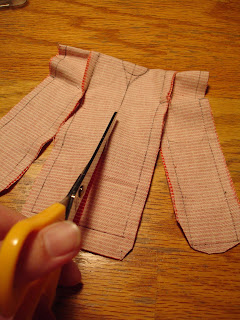
13. Trim corners, as shown.
14. Cut center front line up to and around neck hole.
15. Fold up twice, pin and topstitch hem of body.
16. Fold over ¼” of seam allowance at sleeve edge and topstitch.
17. Turn sleeves inside out.
18. Fold binding in half and pin along center front (including neck hole), sandwiching raw fabric edge inside binding.
(Leave enough binding at bottom hem to tuck inside.)
19. Topstitch binding.
If you like, add a snap to the overlapping center front to hold closed and/or tie a ribbon around her waist.
Your doll now owns her own custom kimono!
(My lovely model for this project was Aidyn, an 8" BJD by Goodreau Doll.)


Very nice, Jen! You make it look so easy!
ReplyDeleteI'll have to try this!
ReplyDeleteWow! That looks so easy! I may actually have to try this out! Thanks for the great tutorial!!
ReplyDeleteSo cute, and what a great looking tutorial!
ReplyDelete